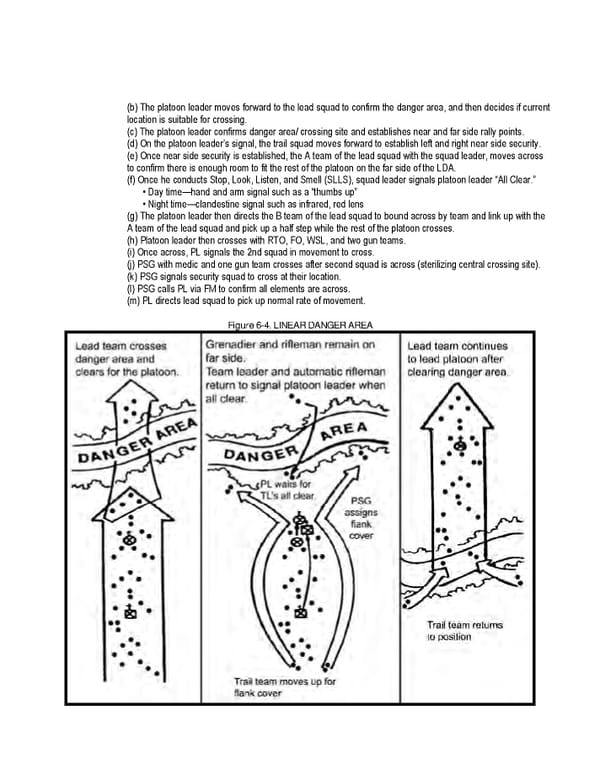
(b) The platoon leader moves forward to the lead squad to confirm the danger area, and then decides if current location is suitable for crossing. (c) The platoon leader confirms danger area/ crossing site and establishes near and far side rally points. (d) On the platoon leader’s signal, the trail squad moves forward to establish left and right near side security. (e) Once near side security is established, the A team of the lead squad with the squad leader, moves across to confirm there is enough room to fit the rest of the platoon on the far side of the LDA. (f) Once he conducts Stop, Look, Listen, and Smell (SLLS), squad leader signals platoon leader “All Clear.” • Day time—hand and arm signal such as a “thumbs up” • Night time—clandestine signal such as infrared, red lens (g) The platoon leader then directs the B team of the lead squad to bound across by team and link up with the A team of the lead squad and pick up a half step while the rest of the platoon crosses. (h) Platoon leader then crosses with RTO, FO, WSL, and two gun teams. (i) Once across, PL signals the 2nd squad in movement to cross. (j) PSG with medic and one gun team crosses after second squad is across (sterilizing central crossing site). (k) PSG signals security squad to cross at their location. (l) PSG calls PL via FM to confirm all elements are across. (m) PL directs lead squad to pick up normal rate of movement. Figure 6-4. LINEAR DANGER AREA
 Ranger Handbook Page 107 Page 109